How to choose a waterproof label printer for beverage labels
12th Nov 2026
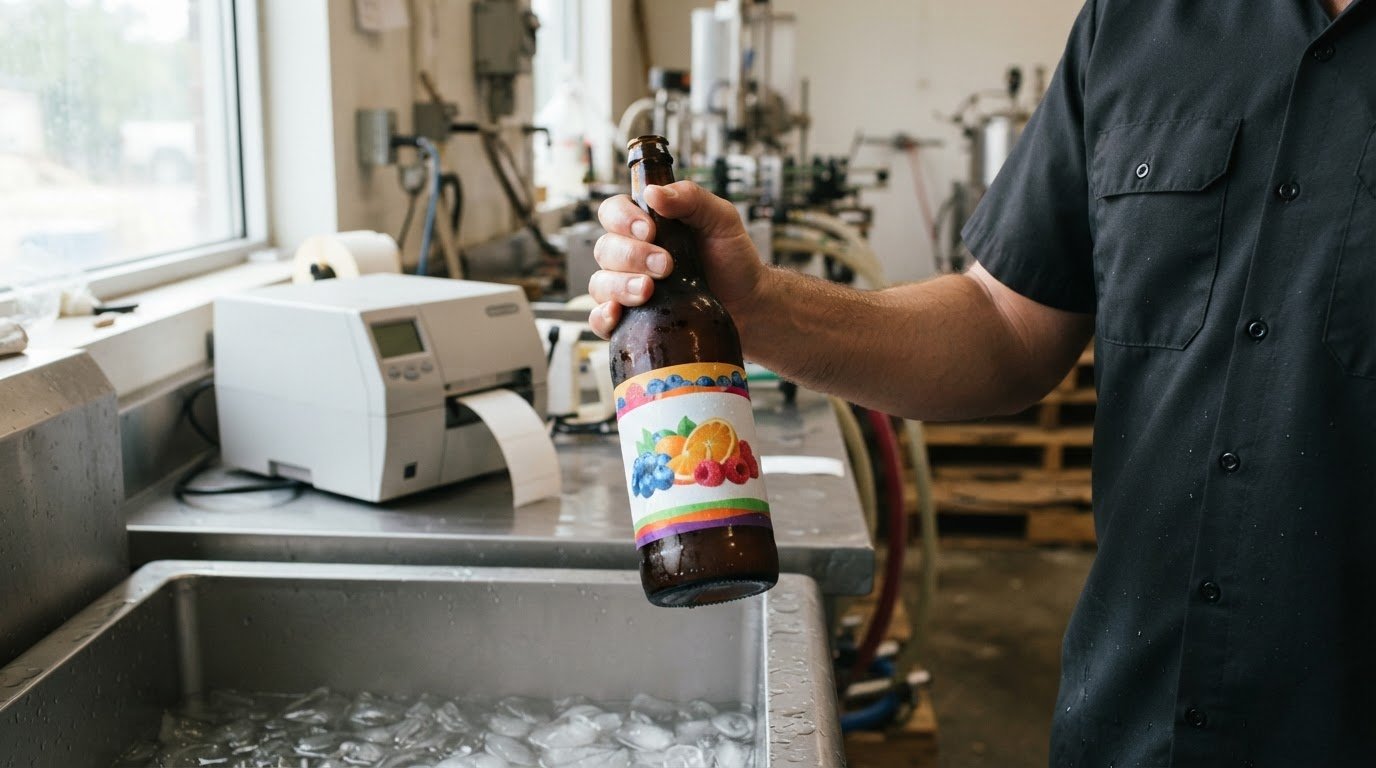
The printer alone doesn’t make a beverage label waterproof. Choosing a waterproof label printer for beverages means matching the printer with synthetic label material, compatible ink and a finish suited to the conditions; for freezer use, the adhesive must also be rated for low temperatures. This combination helps labels stay readable through condensation, refrigeration and ice exposure.
Moisture can change a label’s appearance, loosen its edges or affect printed details. When choosing a waterproof label printer for beverages, consider durability as well as appearance. The right setup depends on how the container will be stored, handled and chilled.
This guide explains how to match label materials, adhesives and finishes to glass, plastic and metal containers. It also covers ice buckets and freezers, plus how expected lifespan, total cost and sustainability can shape your decision.
Key Takeaways
- Match label material and finish to the actual exposure, from condensation to immersion in ice.
- Choose an adhesive for the container surface and storage conditions; freezer use calls for freezer-grade adhesive.
- Compare films, coatings and laminates by how they protect print from moisture, scuffs and handling.
- Estimate label lifespan by considering application and exposure, not just the printer or label material alone.
- Balance durability with sustainability by weighing material and finish options against the demands of your beverage packaging.
Beverage labels exposed to ice, refrigeration, and condensation
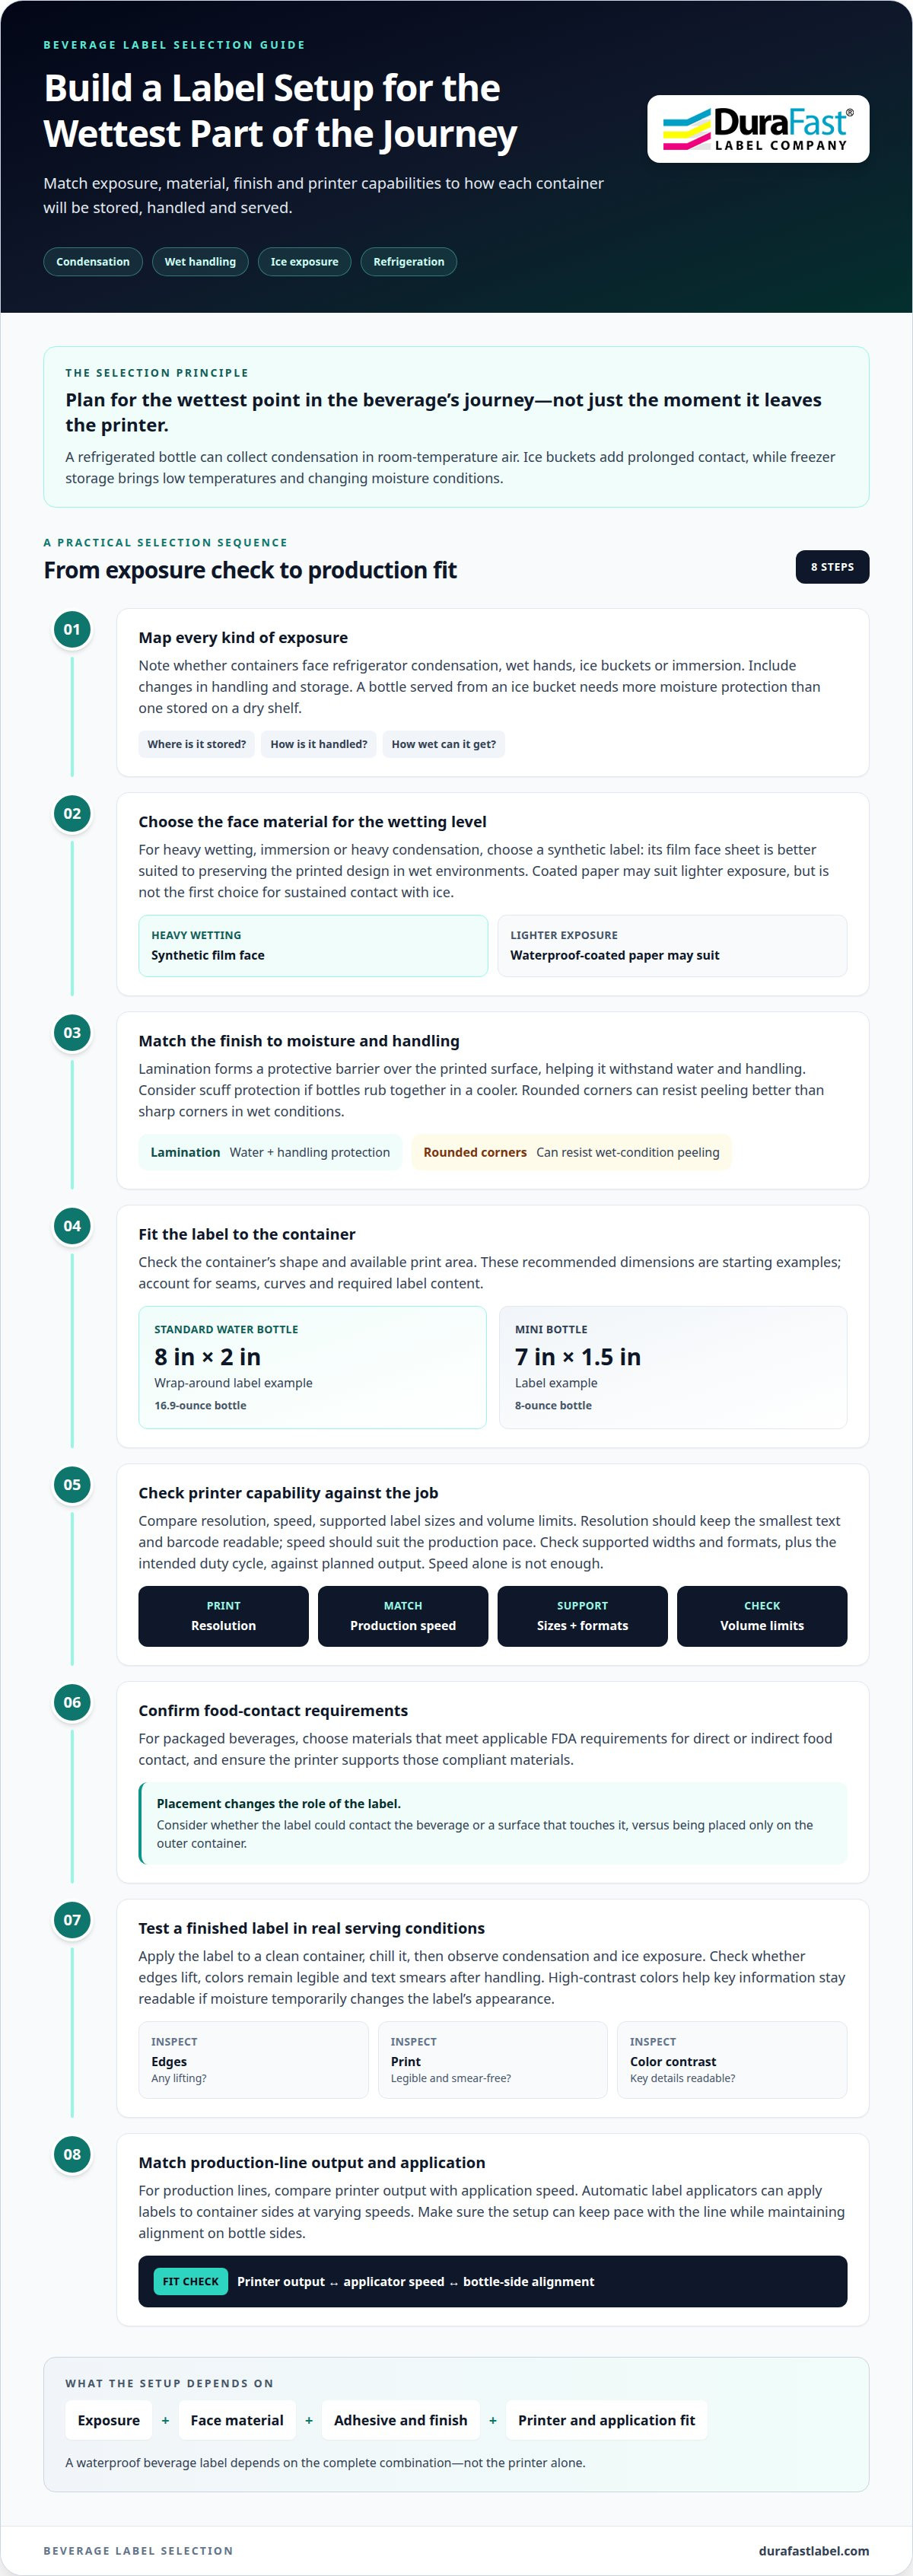
Plan for the wettest point in a beverage’s journey, not just the moment it leaves the printer. A bottle may move from a cool refrigerator to room-temperature air, collecting condensation across its label. Ice buckets add prolonged contact, while freezer storage brings low temperatures and changing moisture conditions.
- Map each type of exposure before choosing a label. Note whether containers face refrigerator condensation, wet hands, ice buckets or immersion. A bottle served from an ice bucket needs more moisture protection than a product stored on a dry shelf. Include changes in handling and storage in the same assessment.
- Choose a synthetic face material for heavy wetting. Synthetic labels are better suited than waterproof-coated paper to immersion or heavy condensation. A film face sheet helps preserve the printed design in wet environments. Coated paper may suit lighter exposure, but it is not the first choice for sustained contact with ice.
- Match the finish to the moisture level. Lamination creates a protective barrier over the printed surface, helping it withstand water and handling. Consider whether the label also needs scuff protection as bottles rub together in a cooler. Rounded corners can resist peeling better than sharp corners in wet conditions.
- Check label dimensions against the container’s shape and available print area. For example, an 8-inch by 2-inch wrap-around label is recommended for a standard 16.9-ounce water bottle. A 7-inch by 1.5-inch label is recommended for a mini 8-ounce bottle. Treat these as starting examples, then account for seams, curves, and required label content.
- Compare printer resolution, speed, supported label sizes and volume limits with the job. Resolution should keep the smallest text and barcode readable, while speed should suit your production pace. Check supported label widths and formats, along with the printer’s intended duty cycle, against planned output. These factors matter more than speed alone.
- For packaged beverages, choose materials that meet applicable FDA requirements for direct or indirect food contact. The printer must support those compliant materials. Consider label placement: a label that could contact the beverage or a surface that touches it has a different role from one placed only on the outer container.
- Test a finished label under actual serving conditions. Apply it to a clean container, chill it, then observe condensation and ice exposure. Check whether edges lift, colors remain legible and text smears after handling. Use high-contrast colors so key information stays readable if moisture temporarily changes the label’s appearance.
- For production lines, compare printer output with application speed. Automatic label applicators can apply labels to container sides at varying speeds. Make sure the selected setup can keep pace with the line, while maintaining alignment on bottle sides. Beverage labeling differs from unrelated applications such as pillow law labels, which serve another product and use case.
Label durability and moisture resistance
Test a finished label on the actual beverage container. Expose it to water, ice, refrigeration, rubbing and the intended dishwasher cycle, then inspect the print, edges and surface.
Peeling often starts on a damp, dirty or curved container. Wet handling can cause smearing, while rubbing may scratch unlaminated ink. Wrinkles can form if a label is misaligned or forced around a tight curve.
- Start with a baseline sample. Apply a label to a clean, dry bottle, following the material’s application guidance. Record its initial appearance, including edge adhesion, barcode clarity and small-text legibility. This gives you a useful comparison after moisture or handling changes the surface.
- Run a water test before using ice. Wet the label and handle it with a damp hand, then check for ink transfer, blurred text, lifting corners or surface damage. A label that looks intact while wet may still fail after repeated wetting and drying, so inspect it again when dry.
- Test ice exposure separately from light splashes. Place a labeled bottle in an ice bucket and inspect it during exposure and after removal. Standard sticker paper can become damaged after ten minutes in an ice bucket; suitable label materials can remain submerged for hours. Compare the actual label’s performance rather than assuming all “waterproof” stocks behave alike.
- Recreate refrigeration and condensation changes. Chill a labeled container, move it into warmer air and check whether moisture gathers beneath the edges or distorts the print. Repeat the transition: a label may look sound after one cycle but loosen after repeated temperature changes.
- Add abrasion to the test. Rub the printed area and place bottles close together as they would sit in a cooler. Ink on unlaminated printable vinyl can scratch when bottles rub together for hours. Check whether lamination or another suitable protective finish reduces visible wear.
- Use the actual dishwasher cycle if containers will be washed and reused. Test the complete label construction, including face material, ink, adhesive and finish. After washing, inspect for fading, smearing, bubbles, wrinkles and lifted edges. A water test alone does not show how heat, detergent and repeated washing affect the label.
- Trace each failure to its likely cause. Adhesive may struggle on a wet, oily, dusty or sharply curved surface. Smears point to ink and finish compatibility; scratches suggest inadequate abrasion protection. Wrinkles often indicate poor positioning or a mismatch between the label shape and the container’s curve.
- Keep a sample from each material and finish combination. Note the container, exposure test, and observed failure, then compare samples side by side. For help selecting a setup for your conditions, get guidance on label selection.
Waterproof label lifespan, cost, sustainability, and freezer use
- Estimate lifespan from the label’s full working conditions. Appropriate materials, correct application and constant moisture exposure can support a lifespan of several years. This is not a universal service life: handling, abrasion, storage and adhesive performance all affect how long a label remains usable.
- Compare the cost of complete label systems, not just the face material. Include label stock, ink or ribbon, protective finish and waste from failed applications. A durable construction may reduce replacement needs, while an unnecessarily heavy finish can add material without solving the actual exposure problem.
- Choose protection according to expected wear. Overlaminate films offer the highest protection for extreme conditions, while aqueous coatings provide good water resistance for moderate exposure. Aqueous coatings are also described as a more environmentally friendly option. Match the finish to real handling rather than adding layers by default.
- Consider sustainability alongside durability. Estate #9 and Estate #4 are FSC-certified eco-friendly material options. Compare their suitability with the beverage’s storage and handling needs, then assess the full construction, including adhesive and finish. A sustainable face material still needs to perform in the conditions the container will face.
- Specify freezer-grade adhesive for labels applied in freezer conditions. Standard waterproof labels may fail at sub-zero temperatures because water resistance alone does not mean an adhesive will bond in the cold. Freezer-grade options are designed to maintain performance at sub-zero temperatures with condensation.
- Apply freezer labels with the intended temperature and surface in mind. A cold, damp container can challenge adhesion from the start. Use a label construction designed for freezer conditions and test it on the actual container. Watch for edge lift as condensation forms and the package moves between storage conditions.
- Set a realistic replacement plan around product use. A bottle stored briefly in a refrigerator has different demands from a container kept frozen or handled repeatedly. Use the shortest expected storage period and toughest routine handling as practical benchmarks when choosing the label’s lifespan and protection level.
- Balance durability, sustainability and operating cost with a side-by-side trial. Compare a standard construction, a moderately water-resistant finish and a higher-protection option under the same storage and handling conditions. Record legibility, adhesion and visible wear. This helps identify the least complex construction that meets the beverage’s actual needs.
How waterproof labels work
Durable beverage labels combine a printable face material, compatible ink, protective finish and adhesive. Design for the container and its exposure, print on compatible stock, then apply the label to a clean surface.
- Start by defining what the label must do. A bottle stored in a refrigerator needs different protection from a can immersed in ice. Decide which details must remain readable, such as product text, branding or a barcode. This guides choices about material, print method and finish.
- Select a printable face sheet suited to moisture. Synthetic films help protect the printed design in wet settings, while paper is better suited to dry environments. The printer must support the selected stock. A mismatch can prevent reliable printing, even when the face material itself resists water.
- Match ink to the material and finishing process. Inkjet printing can produce water-resistant results when paired with suitable stock and finishing. An additional topcoat can seal inkjet labels and help prevent smearing when a wet hand touches the print. Treat ink, stock and finish as one system.
- Choose a protective layer based on exposure. Aqueous coating provides good water resistance for moderate exposure, while overlaminate films offer stronger protection for demanding conditions. Gloss, matte and soft-touch laminations create waterproof barriers. The right choice depends on handling and appearance needs.
- Consider the print method before finalizing artwork. Digital printing can resist water with suitable materials and finishing. Flexographic printing with UV-curable inks can serve demanding water and chemical applications. Screen printing with specialized inks suits industrial labels exposed to water, chemicals and abrasion.
- Design for legibility on the actual container. Use clear contrast between background and text, and keep important information away from edges and curves. For example, a barcode placed across a bottle seam may be harder to scan. Check the layout at its final label size.
- Print a sample on the selected stock, then inspect fine text, color and edges. Laser printers use waterproof toner without an additional topcoat, while inkjet prints may need a protective coating. Printer and material compatibility matter, so assess the finished label rather than print technology alone.
- Apply the sample to a clean, dry container, pressing from the center outward to limit trapped air. Avoid stretching film around a curve, which can encourage lifting or wrinkles. Let the adhesive bond as intended, then expose the container to the beverage’s real storage and handling conditions.
- Review the printed and applied sample after exposure. Look for smears, scratches, bubbles or lifted corners, and adjust one part of the construction at a time. Changing the finish while keeping the stock and ink constant helps identify which layer needs improvement.
What waterproof label materials and adhesives work best for glass, plastic, and aluminum containers?
- Start with the container’s surface and shape. Glass, plastic and aluminum each present different application conditions. A smooth, rigid glass bottle differs from a squeezable plastic bottle or a curved aluminum can. Match the label construction to the container, then test it after application and chilling.
- Consider BOPP when water exposure is a key concern. This label material resists water, oil and chemicals. White BOPP is listed as suitable for beer-can labels, making it a relevant option for aluminum beverage containers. Pair the face material with compatible printing and a suitable adhesive.
- Choose flexible polypropylene for squeezable bottles. A flexible label can better follow a container that changes shape during use. Polyester film offers greater temperature resistance than polypropylene, so consider polyester when temperature changes matter more than flexibility.
- Match adhesive to the surface and storage conditions. Options include general-purpose, removable, freezer-grade and tight-radius adhesives. A tight-radius adhesive suits labels that need to follow a curved container, while freezer-grade adhesive is designed for sub-zero conditions with condensation.
- Use permanent adhesive when a beverage label should stay in place. Permanent adhesives are suitable for beverage bottles and safety warning labels that should not be removed. In wet settings, extra-strength adhesive can help labels stay attached. The right choice still depends on the container and its actual exposure.
- Select removable adhesive when clean removal matters. Removable waterproof adhesives can allow labels to come off cleanly. Heat from a hair dryer may help soften the adhesive during removal. This option suits containers where removal is part of reuse or presentation, rather than permanent identification.
- Add a protective layer for prolonged immersion. Self-adhesive lamination is recommended for labels submerged in water for days. A laminate protects the printed face, but it does not replace a suitable adhesive. Consider both layers together, especially for containers that will be chilled or handled while wet.
- Test one construction on each container type before settling on a production choice. Apply the label, chill the container, and inspect for edge lift, wrinkles, and print damage. For glass, plastic, or aluminum, get help choosing a label setup that fits the material and storage conditions.
When temperature variation is the main concern, polyester label film offers greater temperature resistance than polypropylene. This distinction can help narrow the face-material choice for containers exposed to changing temperatures, while polypropylene remains an option when flexibility for a squeezable package matters. Decide based on the actual application rather than treating one material as universally best.
After selecting a film, assess the adhesive separately. The face material’s temperature resistance does not establish that the label will remain bonded to glass, plastic or aluminum in every wet or chilled condition. Test the complete construction on the intended container before settling on a choice.
DuraFast Label Company: Labelview label design and barcoding software
DuraFast Label Company offers Labelview label design and barcoding software for beverage businesses preparing clear, consistent label layouts. Once you’ve selected materials and defined the conditions your labels must handle, Labelview can support the design and barcode part of your workflow.
For printing, options include the Epson ColorWorks C6000A and other high-performance color label printers. DuraFast Matte Chemical Labels are another available label option. The right combination depends on your design, container, and exposure needs, so consider each part as a system rather than choosing a printer alone.
For help connecting your beverage-label requirements with these offerings, contact DuraFast Label Company.
Build a label standard your team can reuse
Choosing a waterproof label printer for beverages is an opportunity to make packaging decisions repeatable. Create a simple internal label specification that records approved artwork, container type, material, adhesive, print method and intended storage conditions. This gives production and purchasing teams a shared reference when a product changes or a new beverage joins the lineup.
Keep a production sample with that specification. A physical reference helps teams compare later print runs for color, layout and overall appearance. If the container, storage process or label design changes, update the sample and approved specification together. This makes future decisions clearer without requiring a fresh evaluation for every new label.
For help aligning your beverage-label plans with suitable printing and label options, contact DuraFast Label Company. A clear starting point can make your next packaging decision easier.
Frequently Asked Questions
What label printers can print waterproof labels for beverage bottles and cans?
A waterproof label printer for beverages must support the chosen label material and printing process. DuraFast Label Company offers the Epson ColorWorks C6000A, Afinia L801 Color Label Printer, and Zebra ZT411 Thermal Transfer Printer. These are equipment options, not a guarantee that every label printed will withstand moisture. Match the printer with compatible stock and ink or ribbon, then test a sample on the actual bottle or can.
Which printer technologies and ink types produce water- and condensation-resistant beverage labels?
Inkjet and thermal transfer can both be part of a moisture-resistant labeling setup, but performance depends on the complete construction. Suitable label material and finishing can make digital printing water-resistant; inkjet labels may need a topcoat to help prevent smearing from wet hands. Thermal transfer uses a ribbon, so match the ribbon and label stock to the intended use. Test the finished label through condensation and handling before choosing a production setup.
How much do waterproof beverage label printers, labels, and ink cost in the United States?
Total cost depends on printer type, production volume, label dimensions, face material, adhesive, ink or ribbon and protective finish. A short run with full-color artwork has different supply needs from frequent printing of simpler labels. Include wasted stock and replacement labels in your planning. Compare complete operating setups for your expected output and exposure conditions, rather than judging a printer by its purchase cost alone.
Do beverage labels need waterproof certification or specific food-contact-safe materials?
Water resistance and food-contact suitability are separate considerations. Choose label materials that meet applicable FDA requirements for direct or indirect food contact when the label’s placement could bring it into contact with the beverage or a surface that touches it. Waterproof performance depends on the face material, print, finish and adhesive. Consider the label’s position on the package and select materials for both contact conditions and expected moisture exposure.